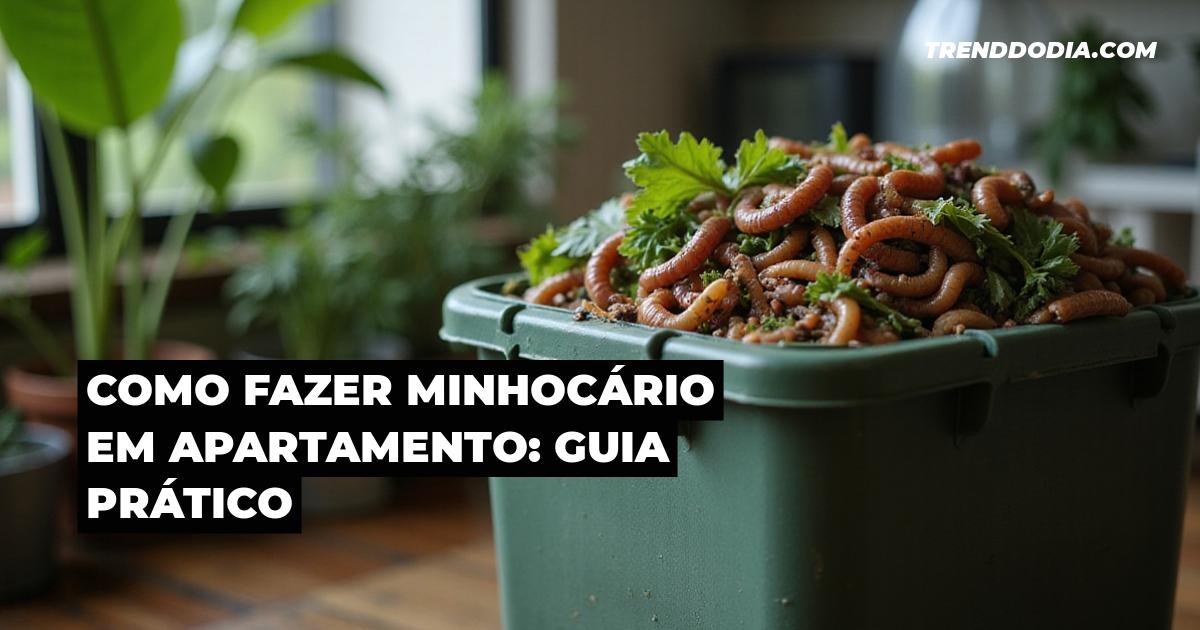
To make a wormery in an apartment, you will need 3 stackable plastic boxes, Californian earthworms, holes drilled in and assembled boxes, a bedding of paper and humus, kitchen scraps added, and controlled humidity and temperature. In 2 to 3 months, the humus and biofertilizer will be ready.
With a space of less than 0.5 m², you can cut almost half of your kitchen waste and still have free compost for your garden. The secret is to set everything up correctly from the beginning and avoid some mistakes that make the wormery smell bad or fill with flies.
Why having a worm farm in an apartment is worthwhile.
Having a wormery in an apartment makes sense for those who want to care for the environment without lifting weights. You transform kitchen waste into something useful, like compost for flower pots, and this helps reduce waste going to landfills.
This system is easy to set up at home, takes up little space, and works well in large cities where organic waste is abundant. Imagine a young woman in São Paulo separating fruit and vegetable peels, putting everything in a wormery in her bathroom, and eliminating almost all of her daily organic waste. She uses the humus for potted plants on her balcony, creating a sustainable cycle.
In addition to helping the planet, a wormery brings real savings. You stop buying fertilizer and lower your garbage bill, since less waste leaves your home.
In several Brazilian cities, around 50% of household waste is organic, according to studies by Embrapa (2022). This shows how a worm farm can be a practical change for your home.
Benefits for your kitchen waste
A worm farm helps to give a sustainable end to food scraps. Things like fruit and vegetable peels that would go to waste now stay at home, being processed by the worms.
This prevents bad smells in the kitchen and reduces litter on the streets. The result is a cleaner house overall.
Advantages for your plants and your wallet.
The resulting humus is rich in nutrients and perfect for potted plants. You can accelerate foliage growth without spending money on chemicals.
Furthermore, saving money on fertilizer leaves more money in your pocket for other things. It's a way to invest in sustainability with a good return.
Materials and minimum space needed to set up your wormery.
To set up a wormery in an apartment, you need basic items that are easy to find. The key is to choose inexpensive and practical materials for home use.
The ideal space is small, around 0.5 m², to easily fit in apartments of 40 to 60 m² without being inconvenient. Domestic systems work well with 500 g of earthworms to start, according to technical materials from Embrapa (2021).
To illustrate, someone in a 40 m² apartment in Curitiba uses three 60 x 40 cm plastic boxes stacked in a corner of the laundry room, occupying less than half a square meter. It's a simple solution that adapts to tight spaces.
So, you start small and adjust as you accumulate more household waste. The focus is on practicality, not expensive equipment.
List of materials with inexpensive options.
You will need stackable plastic boxes, Californian earthworms, shredded paper, soil or humus, and simple tools like a drill and hammer. All of this is inexpensive and can be found in regular stores.
Inexpensive options include picking up used or recycled plastic crates, and looking for earthworms from local suppliers at affordable prices.
How to choose the best place in your apartment
The ideal location should have shade, good ventilation, and be away from direct heat, such as sunny windows. This helps the earthworms function properly.
In apartments, a utility area or laundry room usually works well, as long as there's enough space to stack the boxes. Choose a cool, easy-to-reach spot for daily maintenance.
How to Care for Plants in an Apartment: Practical Tips
How to assemble a worm farm step by step
Setting up a wormery is very easy; by following simple steps, you'll finish quickly. Start by preparing the boxes and then configure everything for the worms.
See the account of someone in Florianópolis who took three ordinary plastic boxes from a hardware store, drilled holes with a drill borrowed from a neighbor, and assembled the first wormery module in just one afternoon. It shows that with creativity and basic tools, it works.
Meanwhile, the ideal temperature is between 12°C and 28°C, as indicated for Californian earthworms by Embrapa guidelines (2020). Therefore, avoid very cold or very hot places.
Thus, by following these steps, the worm farm gets up and running, giving visible results in weeks.
Preparing the boxes and holes
First, take the plastic boxes and make 0.5 cm holes in the bottom and top sides. These holes allow water to drain and ventilation to enter, without dampening the entire house.
Next, stack the boxes on top of each other, leaving space for the liquid to drip. Use this structure to move the worms between the levels as they process the material.
Making the worm bed and the first feeding.
Collect shredded paper or dry leaves and mix them with soil or worm castings to create a soft bed. Add the worms to this mixture and let them get used to it.
Soon after, give them light foods like chopped fruit peels, covering everything with more paper to prevent odors.
What can you put in the wormery and how often?
In a wormery, you can add various organic waste materials, as long as they are balanced. Ideally, you should mix permitted foods with dry matter to create a balanced diet.
Technical materials from Embrapa (2020) state that it is best to maintain humidity similar to that of a damp sponge, without dripping water. This way, you avoid problems such as bad smells.
For example, a family in Belo Horizonte keeps fruit and vegetable peels in a small container in the refrigerator, and every other day they take this chopped-up material to the wormery, always covering it with shredded paper or dry leaves. This routine keeps everything running smoothly.
Recommended, moderate, and prohibited foods
Good choices include fruits, vegetables, and non-citrus leftovers, such as cooked rice. Avoid meats, dairy products, or strong spices that attract insects or cause odors.
Use ground coffee items sparingly, and never add oil, plastic, or metal, as these harm the worms and the process.
How to control humidity, odor, and gnats.
Maintain moisture by adding water occasionally, but avoid soaking. To prevent odors, always cover well with dry material.
If flies appear, mix more shredded paper on the surface to block eggs. These precautions prevent most common problems.
Common problems in worm farms and how to solve them.
Problems like strong smells or worms escaping are common in the first few months, but they have easy solutions. The key is to identify them quickly and adjust with practical changes.
Consider the case of someone living in Recife who noticed many small flies on hot days. They solved the problem by better covering the waste with dry material and placing a thin cloth over the lid of the boxes to prevent insects from entering. This shows that local adaptations work.
In these scenarios, environmental education materials state that up to 90% of earthworm escapes in urban systems in Brazil are due to excessive heat or humidity, based on practical surveys by technicians (2021). Therefore, monitoring this is very helpful.
Therefore, by correcting these errors right away, you guarantee a healthy and productive worm farm for a long time.
Strong smell, larvae and small flies.
A strong smell comes from lack of air or too much water, so increase ventilation with more holes and reduce the water. Larvae appear due to uncovered food; this can be resolved by mixing ashes or paper on top.
Fruit flies disappear with thick coverings and by cutting very moist foods, maintaining a balance between clean and dry.
Earthworms escaping, dying, or stopped
Earthworms flee when exposed to high heat or acidic bedding; move the wormery to a cooler location and add neutral substrate. If they stop moving, they may be cold, so check the temperature and warm it up if necessary.
Death rarely occurs due to excessive waste, hence a balanced diet prevents unnecessary losses.
How to Make Homemade Compost Tea: A Simple Guide 2026
How to harvest and use humus and liquid biofertilizer.
Harvesting humus is easy when it becomes dark and odorless. You separate the layers and use the diluted liquid on the plants.
Rural extension materials from Embrapa (2020) suggest dilutions of about 1:10 for liquid biofertilizer in plants. It is a safe way to nourish without overdoing it.
For example, a resident of Porto Alegre, every 3 months, separates the darker humus from the top bin, dilutes the collected liquid in a 1:10 ratio with water, and uses it to water peppers and succulents on the kitchen windowsill. This demonstrates its practical use in small pots.
How to tell if humus is ready for use
The finished humus is black, smells like earth, and has no bits of trash. Wait 2 to 3 months for it to fully mature in the wormery.
Test by mixing a portion with water; if it doesn't smell bad, it's good for the plants.
Tips for using in pots and apartment gardens
Mix the humus with soil in pots to strengthen roots. For vegetable gardens, use the liquid as a natural fertilizer every 15 days.
Start slowly to avoid suffocating plants, always diluting the final product.
You learned about the necessary materials and space, the step-by-step process for setting up a wormery in an apartment, what you can and cannot put in it, how to avoid and correct problems with odor, heat and flies, and how to harvest and use the humus and biofertilizer on plants.
Start a small wormery this week, test with a small amount of waste at first, and share any questions or experiences in the comments to exchange tips with others who also compost in apartments.